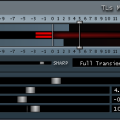
 The compressor is one of the most powerful tools you have at your disposal when mixing your tracks. Almost all DAWs come with at least one compressor plugin. At the same time it’s probably the most misused. If you’re like me, you probably have a basic idea of what a compressor does, but no clear understanding of what the different settings do and when and how to use it. Let’s try and remedy that!
The Theory
A compressor reduces the dynamic range of a sound, i.e. it decreases the difference between parts with low volume and parts with high volume. Your first reaction should be that this is bad – we want dynamics, it makes the songs interesting and leaves room for dramatic changes to different parts. Misused, too much compression leads to flat results (see Loudness Wars). However, there are numerous legitimate uses of compressor (see below).
More specifically, a compressor reduces the volume of a signal when it reaches a certain level. The common parameters of all compressors are:
Threshold – the volume level where the compressor starts working. A high threshold means most of the signal is untouched, a low threshold means most of the signal is processed. Example: 10 dB.
Ratio – ratio is the factor by which the volume level that exceeds the threshold is reduced. Example: 6:1. With a threshold of 10 db and a ratio of 6:1 an input signal of 16 dB would be reduced to 11 dB (the 10 dB below the threshold untouched and the 6 dB above reduced by a factor 6 to 1 dB – total 10 dB + 1 dB = 11 dB). A ratio of 2:1 is very mild, 10:1 is very strong. A compressor working at 10:1 or above is usually called a limiter.
Attack – the speed at which the compressor kicks in. An attack of 0 ms means that the compressor starts reducing signals above the threshold immediately, a slower attack means it waits a while allowing some signal through unreduced.
Release – the speed at which the compressor stops processing the sound after the signal has dropped below tve threshold.
Gain – since a compressor can only reduce volume, you usually need to raise the volume of the track to get the desired effect. To avoid having change the volume of the actual track, compressors have a built-in gain. This is good because you don’t want the volume of the track to suddenly jump through the roof if you disable or remove the compressor plugin.
Apart from this, different compressors may have lots of other settings.
Usage Scenarios
Loudness – your song is done but sounds really quiet compared to commercial songs at the same volume setting. But if you crank up the master volume the peaks go into the red and get clipped off. If you apply a compressor at a high ratio (i.e. a limiter, 10:1 or above) you can increase the gain without clipping. This is part of the mastering stage, after mixing is done. Beware though, the more you increase gain and compress the signal, the less dynamics you’ll have. You run the risk of making your song really loud but flat. There will be specific posts about mastering later on, so stay tuned.
Evening out peaks – if you have a track with some random peaks that are very high compared to the rest of the track you can iron them out with compression. Peaks like that can be results of slipups when singing, an unplayed string accidentally ringing out on a guitar etc. Theoretically you should fix flaws like that by re-recording the track without mistakes, but we all know what reality’s like. Set the threshold where the wanted maximum peaks are (but of course below the unwanted peaks) and a high ratio and short attack.
Sustain – by increasing the volume of the last part of say a guitar chord, you can make it last longer i.e. have a longer sustain. But doing this manually in a DAW is a lot of work. Using a compressor you can increase the volume of the whole chord, and then setting the threshold to a low level. This way the main part of the chord will be compressed but the end part will be left untouched (at a higher volume level than before), creating longer sustain.
Sidechaining – a really cool compressor technique is letting the signal of one track control the compression of another. Use this if you want a track to be quieter when another track makes sound. Typical use: if your bass and your kick drum mush up each other, you can sidechain the kick to go quieter when it coincides with the bass, but not when played by itself.
More About Compressors
If you want to learn more about compressors and compressor techniques, the web is full of tutorials and resources. Here are some of the ones I used to learn:
http://www.beatportal.com/feed/item/tutorial-how-to-use-compression/
http://audio.tutsplus.com/tutorials/production/5-compression-techniques-and-how-to-use-them/


